FARO laser scanners improve the efficiency of construction management

Industry: Construction
Application: 3D file
Advantages:
▶Significantly reduce the time of measurement management work
▶ Compact and lightweight, easy to install, suitable for multi-point scanning
▶ Horizontal installation is possible
Sumitomo Mitsui Construction Corporation (SMCC) has developed an "automatic inspection system for completed structures" that calculates bridge dimensions from point cloud data by measuring cross sections of concrete Bridges under construction using the FARO® Focuss 350 Laser Scanner 3D Laser Scanner. With this system, the time required to measure a cross section has been slashed by nearly half.
Next, it introduces how to make full use of the compact and light features of Focuss 350 for construction management.
Automatically create as-built drawings and written reports based on point cloud data
In the construction of prestressed concrete bridges (PC bridges), which Sumitomo Mitsui Construction is good at, it often uses a construction method called "cantilever erection", that is, the bridge is erected from the piers supporting the bridge to both sides.
Bridges generally take a length of 3~5m as a block, and are erected while pouring concrete in the air using a mobile shaped frame. Since the thickness of the bridge will gradually become thinner as it moves away from the pier, it is very important to perform “forming management” measurements on a block basis to ensure that the geometry of each cross-section conforms to the design.
According to Mr. Taketoshi Mizuta of Sumitomo Mitsui Construction Co., “The previous mainstream measurement method consisted of a five-person team consisting of two surveyors, a photographer, a recording crew, and an inspector. Size. Using this method, each cross-section takes about 45 minutes. Using the newly developed system reduces the on-site measurement time for each cross-section to 20 minutes."

Mr. Taisuke Fujioka, Section Chief of the Structural Technology Department, said, "Now, just use the FocusS 350 to read the point cloud data of the bridge cross section to automatically complete the as-built drawing and written report of the bridge cross section."
Install FocusS 350 horizontally for measurement
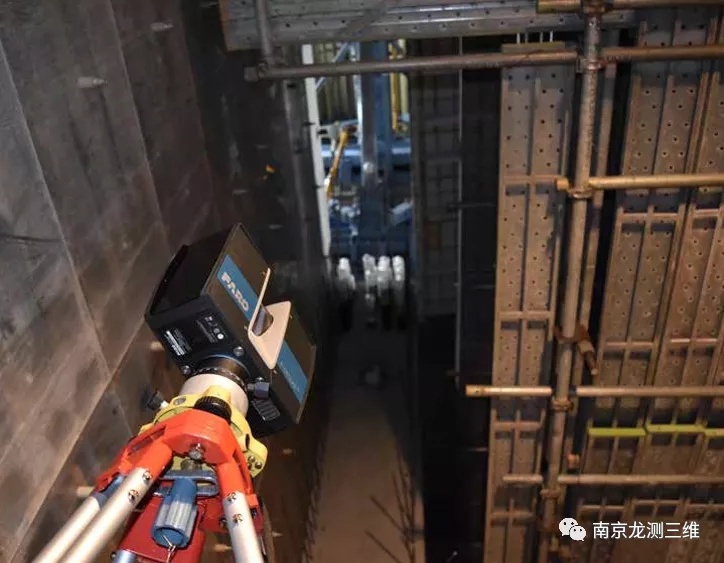
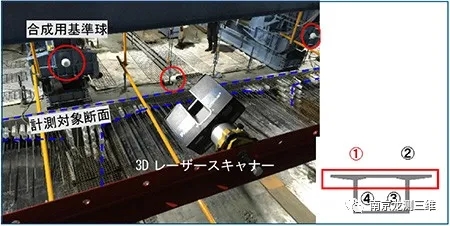
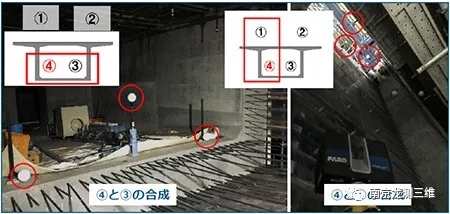
The cross-section of the bridge must be measured after the poured concrete has hardened, and the forming frame must be removed. The FARO FocusS 350 is installed in the four positions on the left and right sides of the front of the bridge in order to perform point cloud measurement on the cross-section of the bridge modules. However, problems were encountered in the actual measurement of the upper left and right points. If a tripod is used, the lower part of the bridge will become a "dead spot" that cannot be measured.
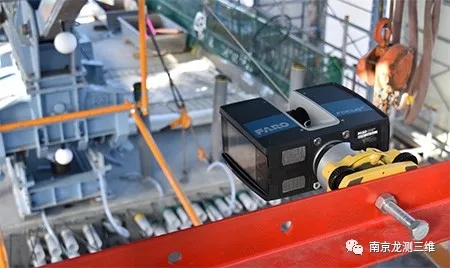
"So, we thought of a method of deflection of the FocusS 350 by 90° laterally for measurement. The lateral measurement was successfully achieved by turning off the gravity sensor." said Rei Takaoka, Director of the Structural Technology Department. "This method of use can only be achieved with the compact and lightweight FocusS 350."

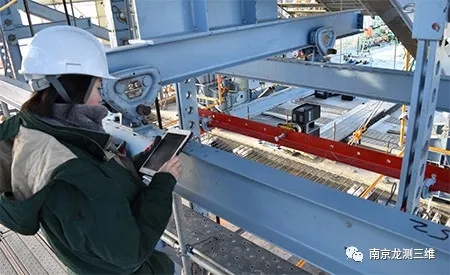
Set up "target balls" in multiple places around the bridge and use them as reference points to synthesize point cloud data measured at 4 locations into unified data. In order to scan from the best angle, the FocusS 350 is installed horizontally on the overhead beam. Although the surveyor has no foothold at this time, he can still perform remote and safe operations through the tablet computer.


The best choice for pursuing hardware and software performance
Why did Sumitomo Mitsui Construction choose the FARO FocusS 350 from the many 3D laser scanners? Director Takaoka explained, “Because the previously used 3D laser scanners are large and heavy, they cannot be installed horizontally in narrow places. The FocusS 350 has the advantages of small, light weight and moderate price, so it is very suitable for use in the field. It is not only It has a long-distance measurement capability of 350m and a high-precision measurement capability. The accuracy can reach ±2mm when the measurement distance is 10m. That's why we chose it."
The FARO FocusS series of 3D laser scanners represented by FocusS 350 have released SDK (software developer kit) for developing corresponding application software, making it easier for users to develop their own application software.
3D laser scanner's unique functions and its scalability
In the past, the method of point cloud data collection relied on a system for analyzing and generating photos taken by a digital camera.
"In this case, the cross-section of the bridge has a lot of protruding steel bars, as well as obstacles such as cable sheaths that penetrate through. It takes hundreds of photos to take photo measurement. However, using a 3D laser scanner such as FocusS 350 can be used at one time. Obtain a large amount of high-precision point cloud data." Mr. Mizuta said when clarifying the advantages of 3D laser scanners.

As for the future, Mr Mizuta said: "The 3D laser scanner can record the number of steel bars and the shape of the deep sections of the bridge, which can then be verified to confirm the shape of each section. In the near future, VR Google glasses can be used to view the on-site point cloud data, so as to realize the remote on-site inspection work mode reform.


